A Basic Improvement in My rsync Script
rsync is used for efficient file synchronization and backup. It copies only the differences between source and destination, saving time and bandwidth.
And it is preinstalled on Ubuntu.
I use rsync to back up some of my folders to external storage like this:
#!/bin/bash

rsync -avh --delete --progress /home/fakhri/Documents/LinguistWork/ /media/fakhri/32Gobkup/LinguistWork_backup/ && \
rsync -avh --delete --progress /home/fakhri/Documents/LinguistWork/ /media/fakhri/8GO/LinguistWork_backup/ && \
rsync -avh --delete --progress /home/fakhri/Documents/LinguistWork/ /media/fakhri/"SAMSUNG SSD"/LinguistWork_backup/ && \
rsync -avh --delete --progress /home/fakhri/Documents/LibreWriter/ /media/fakhri/"SAMSUNG SSD"/LibreWriter_backup/ && \
rsync -avh --delete --progress /home/fakhri/Documents/LibreWriter/ /media/fakhri/8GO/LibreWriter_backup/ && \
rsync -avh --delete --progress /home/fakhri/Documents/LibreWriter/ /media/fakhri/32Gobkup/LibreWriter_backup/ && \
rsync -avh --delete --progress /home/fakhri/Documents/LinguistWork/l10n  /media/fakhri/8GO/LinguistWork_backup/l10n
As you can see, I use && and \.
&&is used to combine two bash commands and run the second command only if the first command succeeds (exits with status 0).\is used for line continuation – it tells the shell that the command continues on the next line, making long commands more readable.
We could use ; instead of &&, but ; would run the second command regardless of whether the first command succeeded or failed. && is safer for backup operations because if the first backup fails, the second won’t run, preventing incomplete or corrupted backups.
The Improved Script with a Loop
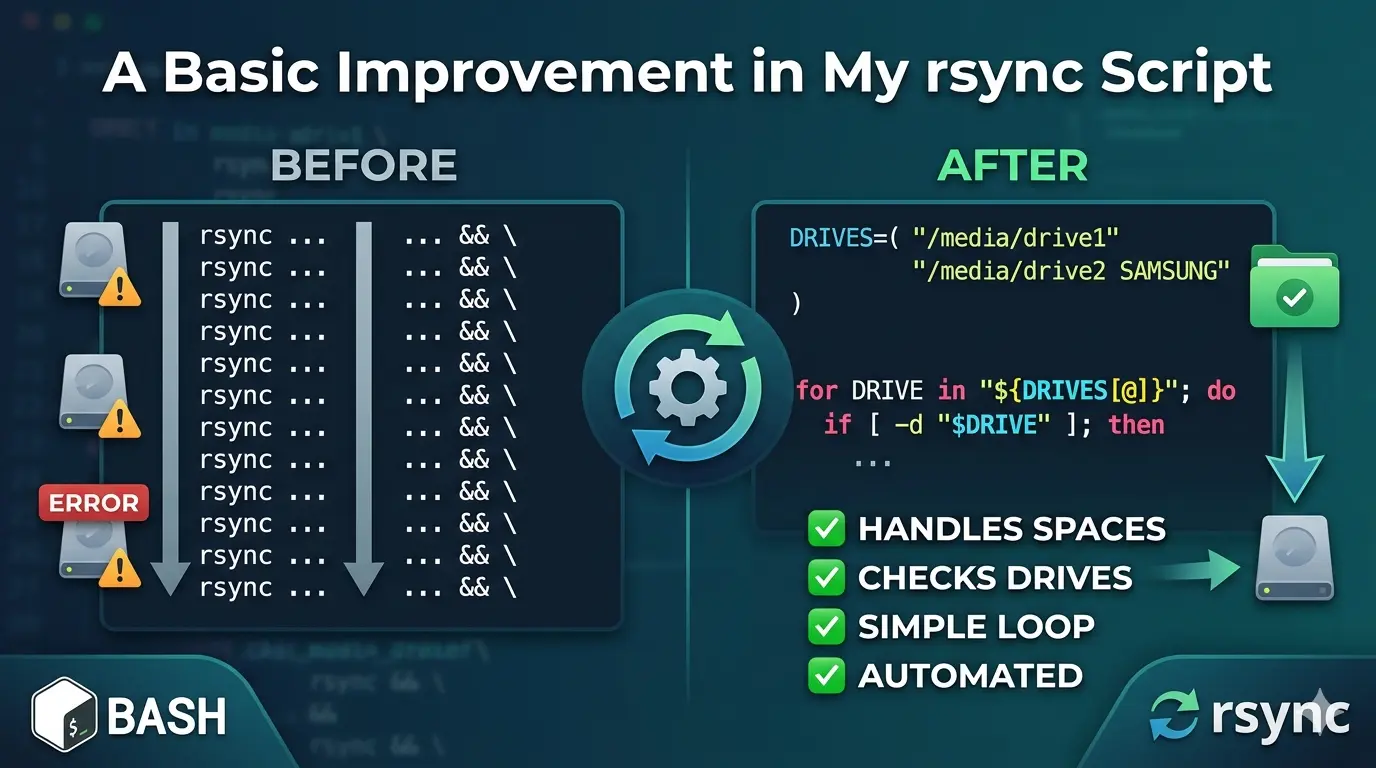
The problem with my original approach is that I had to manually write a line for each external drive. If I added a new drive, I had to update the script. Also, if a drive wasn’t connected, rsync would still try to run and throw an error.
Here’s my improved script that automatically handles multiple drives and checks if they’re connected:
#!/bin/bash

# Define all four backup locations
DRIVES=("/media/fakhri/32Go" "/media/fakhri/8GO" "/media/fakhri/SAMSUNG SSD" "/media/fakhri/500Go")

for DRIVE in "${DRIVES[@]}"; do
    # Check if the drive is actually plugged in before starting
    if [ -d "$DRIVE" ]; then
        echo "-----------------------------------------------"
        echo "Backing up to: $DRIVE"
        echo "-----------------------------------------------"

        # Syncs the entire folder and all its subfolders
        rsync -avh --delete --progress "/home/fakhri/Documents/LinguistWork/" "$DRIVE/LinguistWork_backup/"
        rsync -avh --delete --progress "/home/fakhri/Documents/LibreWriter/" "$DRIVE/LibreWriter_backup/"
    else
        echo "Skipping $DRIVE (Drive not connected)"
    fi
done

echo "Backup process finished!"
DRIVES=("/media/fakhri/32Go" "/media/fakhri/8GO" "/media/fakhri/SAMSUNG SSD" "/media/fakhri/500Go")Array definition. Creates an array variable named DRIVES containing four paths (one per drive). The parentheses () define an array, and each quoted string is an element. Using an array allows us to loop through all drives without repeating code.
for DRIVE in "${DRIVES[@]}"; doThe Very Important Symbol: [@]
The critically important symbol is [@] (at-sign with brackets).
Why [@] is So Important
What it does:
${DRIVES[@]} expands to all elements of the array DRIVES, with each element treated as a separate word.
The Danger of NOT using [@]
If you wrote this incorrectly as:
for DRIVE in ${DRIVES[@]}; do # Missing quotes - WRONG!
Or worse:
for DRIVE in $DRIVES; do # Just wrong - treats array as single string
Here’s what happens with a drive path containing spaces, like "/media/fakhri/SAMSUNG SSD":
| Correct Way | Incorrect Way |
|---|---|
"${DRIVES[@]}" | ${DRIVES[@]} (no quotes) |
SAMSUNG SSD stays as ONE item | SAMSUNG and SSD become TWO separate items |
The script sees: /media/fakhri/SAMSUNG SSD | The script sees: 1. /media/fakhri/SAMSUNG2. SSD (which is not a valid path) |
The Three Array Expansion Options Compared
| Symbol | Behavior | When to Use |
|---|---|---|
$DRIVES | Only first element (treats array as scalar) | Never for arrays |
${DRIVES[*]} | All elements as single string | When you want one combined string |
${DRIVES[@]} | All elements as separate words | Most common – use in loops |
"${DRIVES[@]}" | All elements as separate words, preserving spaces | ALWAYS USE THIS for paths with spaces |
The Golden Rule
Always use
"${ARRAY[@]}"with quotes when iterating over arrays containing file paths.
The quotes + [@] combination ensures:
- Each array element stays intact (spaces preserved)
- Empty elements are preserved
- Special characters (like
*or?) are not expanded
Without this, your backup script will fail silently and try to write to completely wrong locations!
Every Important Symbol Explained
Here’s the breakdown of every critical symbol in these lines:
if [ -d "$DRIVE" ]; then
    # ... backup commands ...
else
    echo "Skipping $DRIVE (Drive not connected)"
fi
done
if [ -d "$DRIVE" ]; then
| Symbol | Name | What it does |
|---|---|---|
if | Keyword | Starts a conditional statement. If the following command returns true (exit code 0), execute the code between then and else/fi |
[ | Test command (left bracket) | A built-in command that evaluates conditional expressions. Must have spaces around it! [ -d "$DRIVE" ] not [-d "$DRIVE"] |
| (space) | Space separator | Required between [ and -d – bash needs spaces to distinguish commands from arguments |
-d | Flag (directory test) | Tests if the following path exists and is a directory. Returns true (0) if yes, false (1) if not |
| (space) | Space separator | Required between -d and the path |
"$DRIVE" | Double-quoted variable | Expands to the value of DRIVE variable while preserving spaces in the path. Without quotes, a path like /media/fakhri/SAMSUNG SSD would break into two words |
| (space) | Space separator | Required between the path and the closing bracket |
] | Closing bracket | Ends the test command. Must have a space before it! |
; | Command separator | Allows multiple commands on one line. Here it separates the test command from then |
then | Keyword | Marks the beginning of the code block to execute if the if condition is true |
else
| Symbol | Name | What it does |
|---|---|---|
else | Keyword | Marks the alternative code block. Executes if the if condition was false (the drive was NOT a directory) |
echo "Skipping $DRIVE (Drive not connected)"
| Symbol | Name | What it does |
|---|---|---|
echo | Command | Prints text to the terminal |
" " | Double quotes | Everything inside becomes a single argument to echo, even if it contains spaces or variables. Variables inside ($DRIVE) still expand |
$DRIVE | Variable expansion | Replaces $DRIVE with its actual value (e.g., /media/fakhri/32Go) |
() | Parentheses | Regular text characters here – just part of the message. Not a command substitution because there’s no $ before them |
fi
| Symbol | Name | What it does |
|---|---|---|
fi | Keyword | Closes the if block. It’s “if” spelled backwards. Every if must have a matching fi |
done
| Symbol | Name | What it does |
|---|---|---|
done | Keyword | Closes the for loop. Marks the end of the loop body. Every for must have a matching done |
The Most Critical Symbol: [ ] (Test Command)
The brackets [ ] are NOT syntax – they are a command!
Mental model:
if [ -d "$DRIVE" ]; then
Is equivalent to:
if test -d "$DRIVE"; then
The [ command is just an alias for test that requires a closing ].
Common Mistakes with [ ]:
| ❌ Wrong | ✅ Correct | Why |
|---|---|---|
[-d "$DRIVE"] | [ -d "$DRIVE" ] | Missing spaces – bash can’t find the [ command |
[$DRIVE] | [ -n "$DRIVE" ] | No flag – what are you testing? |
[ -d $DRIVE ] | [ -d "$DRIVE" ] | No quotes – path with spaces breaks |
Symbol Hierarchy in Context
if [ -d "$DRIVE" ]; then
│  │ │ │        │  │
│  │ │ │        │  └── ends the "then" block start
│  │ │ │        └── separates test from "then"
│  │ │ └── variable expands to actual path
│  │ └── tests if path is a directory
│  └── starts test command
└── begins conditional

then
│
└── marks true block

else
│
└── marks false block

echo "Skipping $DRIVE (Drive not connected)"
│    │                    │
│    │                    └── variable inside quotes expands
│    └── quotes keep everything as one argument
└── prints to terminal

fi
│
└── closes if

done
│
└── closes for loop
Quick Reference Card
| Symbol | Meaning | Remember by |
|---|---|---|
if | Begin conditional | “if this is true…” |
[ | Start test | Left bracket opens the test |
-d | Directory check | “-d” for “directory” |
$ | Variable value | Dollar = value |
" " | Preserve spaces | Quotes = togetherness |
] | End test | Right bracket closes the test |
; | Command separator | Semicolon = stop then go |
then | True branch | “then do this…” |
else | False branch | “otherwise do this…” |
fi | End if | “if” backwards |
done | End loop | “for…done” |
The most important takeaway: [ ] needs spaces inside and outside, and always quote your variables inside tests!
Final Note: Use [[ ]] Instead of [ ]
For Bash scripts, the double-bracket [[ ]] is superior to the single-bracket [ ] used in this article. Unlike [ ] (a command that requires spaces and quoted variables), [[ ]] is a Bash keyword that prevents word splitting and pathname expansion. This means you can write [[ -d $DRIVE ]] without quotes, even if the path contains spaces. [[ ]] also supports pattern matching (== *.txt), regex matching (=~), and natural logical operators (&&, ||). Stick with [ ] only if you need portability to other shells like sh; otherwise, always prefer [[ ]] for cleaner, safer, and more readable conditional tests.